PDF exports with every receipt, and an easier start
Export a summary or report as a PDF with each original receipt, or as a CSV with the fields you choose. New workspaces open on a Get Started page with a practice run, and Help has been rebuilt.
Export a PDF with every receipt
Summaries and reports can now be exported as a PDF. It starts with a table of the expenses and their totals, then gives each original receipt a page of its own: photos and scans as images, receipt PDFs page by page, and emailed receipts as text. It’s one file to hand to your accountant or keep for an audit.
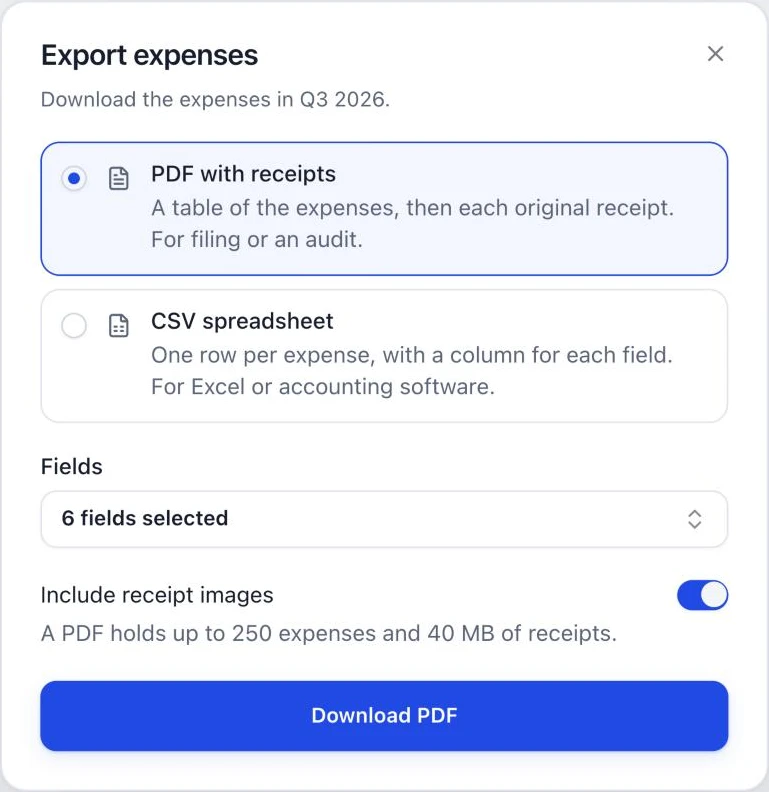
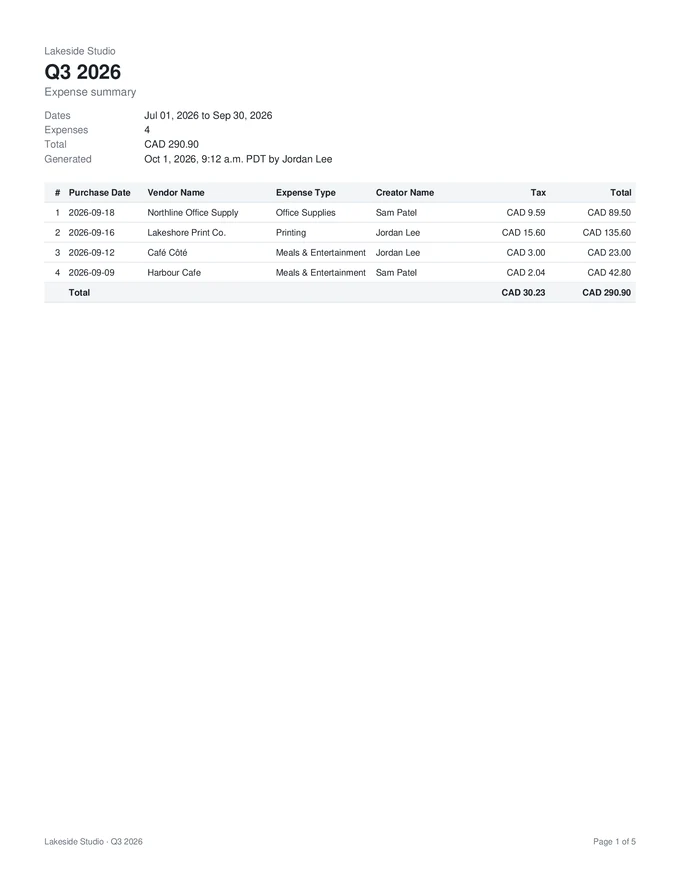
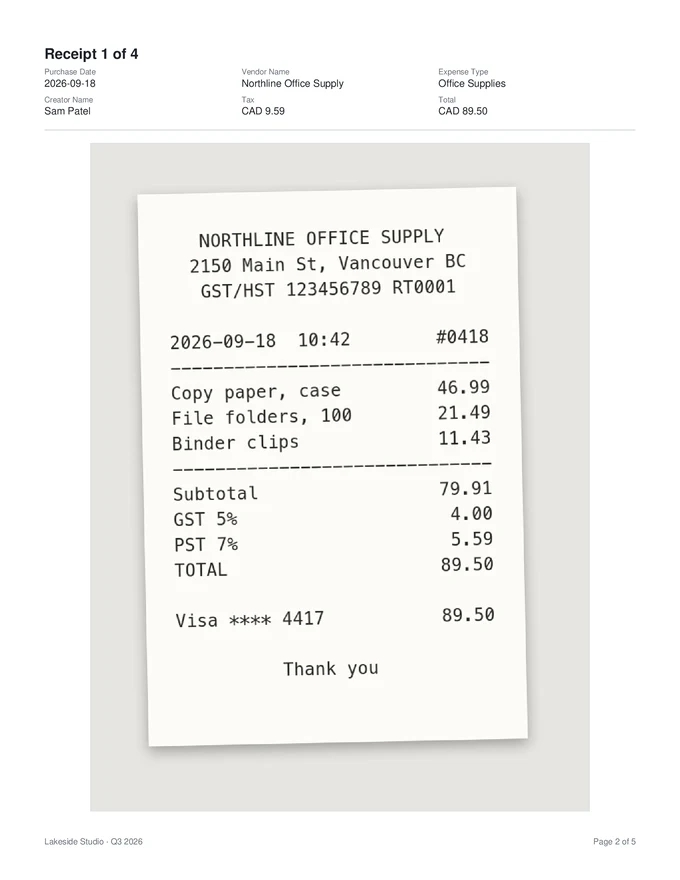
- Choose the fields. Pick the table’s columns, including your workspace’s labels, such as a client or job.
- Just the table. Turn off Include receipt images for a short PDF without the receipts.
- Or a spreadsheet. Choose CSV spreadsheet for one row per expense and a column for each field. It opens in Excel, Numbers, Google Sheets or accounting software.
To export a summary, open the … menu on its row in the Summaries tab and choose Export. To export a report, open it and choose Export PDF or CSV from the … menu next to its status. Anyone who can see a report can export it. A PDF holds up to 250 expenses and 40 MB of receipts. For more, export a shorter date range or download a CSV.
Get Started, for new workspaces
New workspaces now open on a Get Started page with the first things to set up: decide whether expenses need approval, add your first expense, download the app, invite your team and review your categories. Admins can come back to it any time from Get Started in the sidebar.
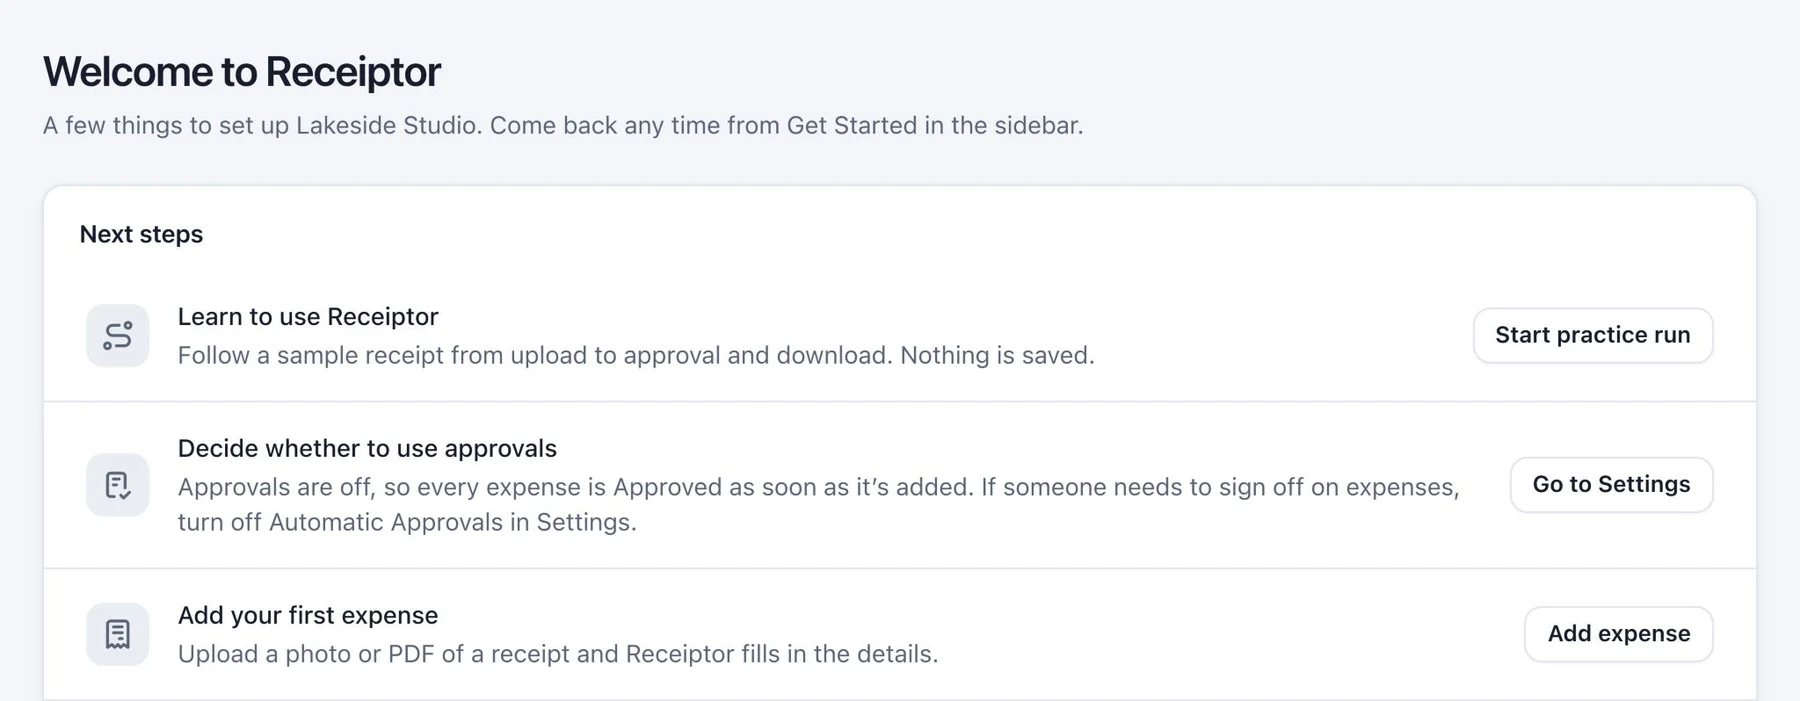
Learn with a practice run
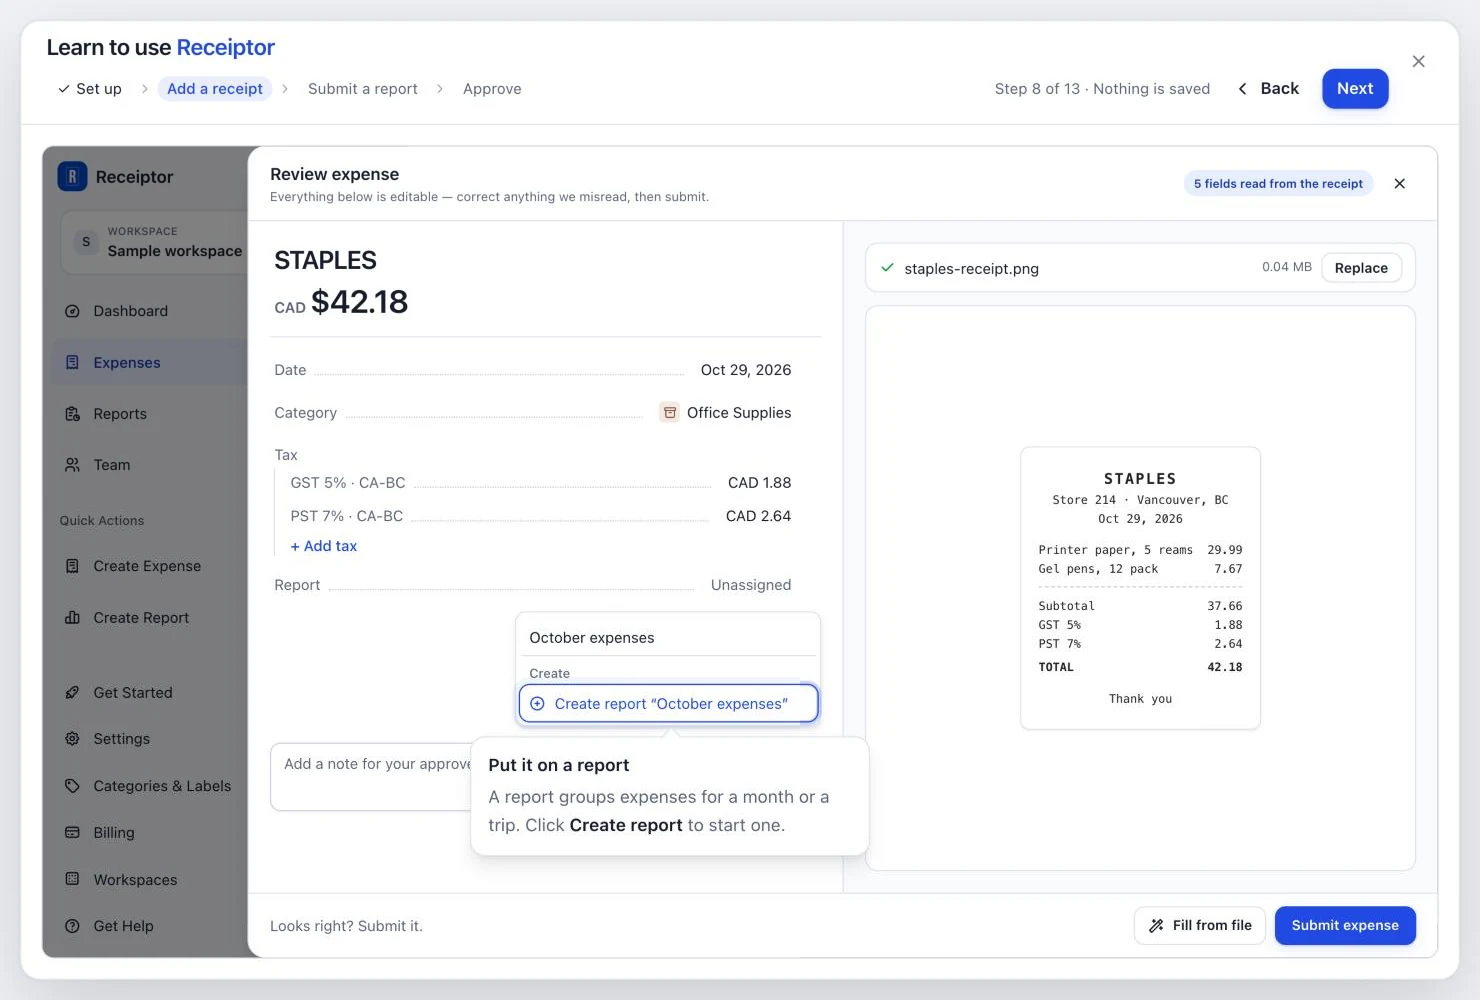
Learn to use Receiptor follows a sample receipt from upload to an approved report in 13 short steps. It covers setting up, adding a receipt, submitting a report and approving it, and says which steps are for Admins. It runs in a sample workspace and nothing is saved, so it’s safe to try at any time. Start it from Get Started or from Help.
Help, rebuilt
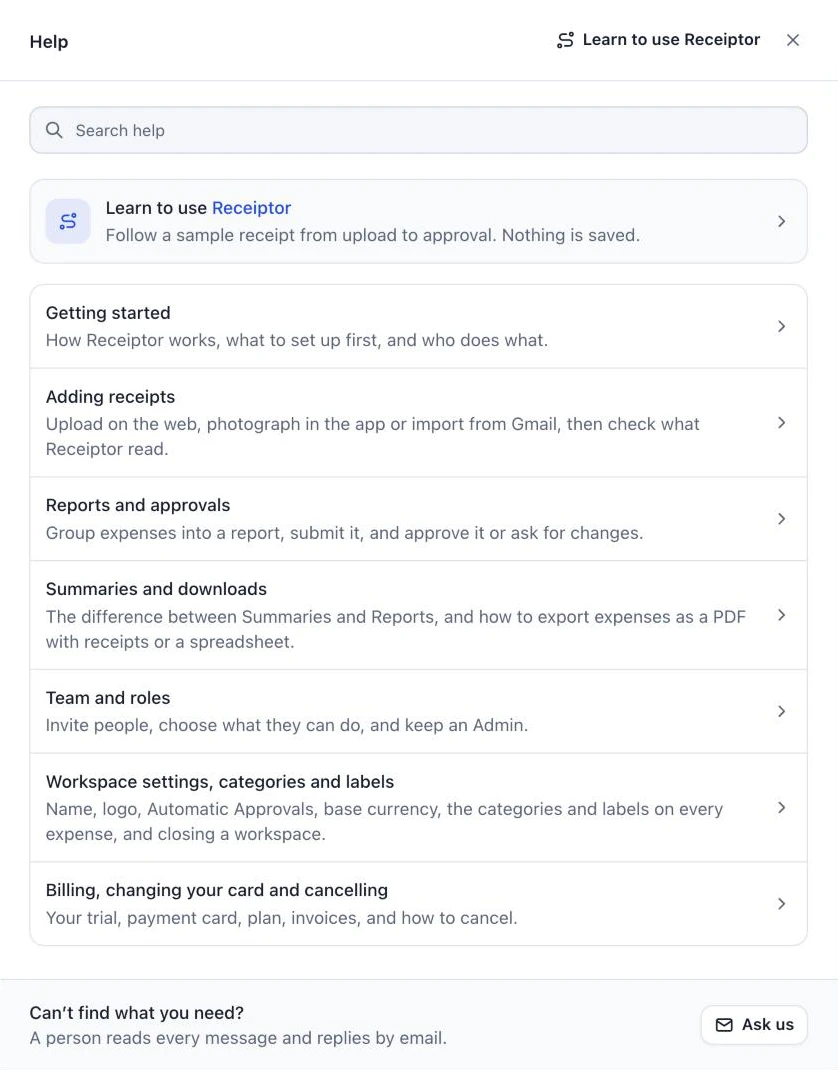
Get Help now has seven sections, one for each part of Receiptor, and search across all of them. Most sections show the screens they describe, and Help opens on the section for the page you’re on. If the answer isn’t there, Ask us sends a message from inside the app, and a person replies by email.
Smaller improvements
- Hover over a report’s status to see what happens next.
- Archiving a report now asks first.
Android app back on Google Play
Receiptor for Android is back on Google Play. Take a photo of each receipt as you get it, and sign in with the same account you use on the web. It needs Android 7.0 or newer.